**因为在每次创建项目,build时都会出现Error:cannot not find package,所以会有这篇文章的诞生**
# 1. 在创建项目前的准备
## 1.1 安装好**golang**,**goland**
## 1.2 查看`GOPATH`
```sh
echo $GOPATH
# 如果需要更改GOPATH可以根据以下操作 (Mac)
vim ~/.bash_profile
export GOPATH=#你的目标地址
#保存
:wq
#刷新
source ~/.bash_profile
```
## 1.3 在`$GOAPTH`文件夹中创建 `pkg`,`bin` ,`src`三个文件夹
```sh
mkdir $GOPATH/pkg # pkg存放编译后的包文件
mkdir $GOPATH/src # src存放项目源文件,我们的项目目录一般在该文件中
mkdir $GOPATH/bin # bin存放编译后的可执行文件
```
可以看到我们的目录结构是这样的
```
$GOAPTH
|-bin
|-pkg
|-src
|-(项目名称,之后要创建的)
```
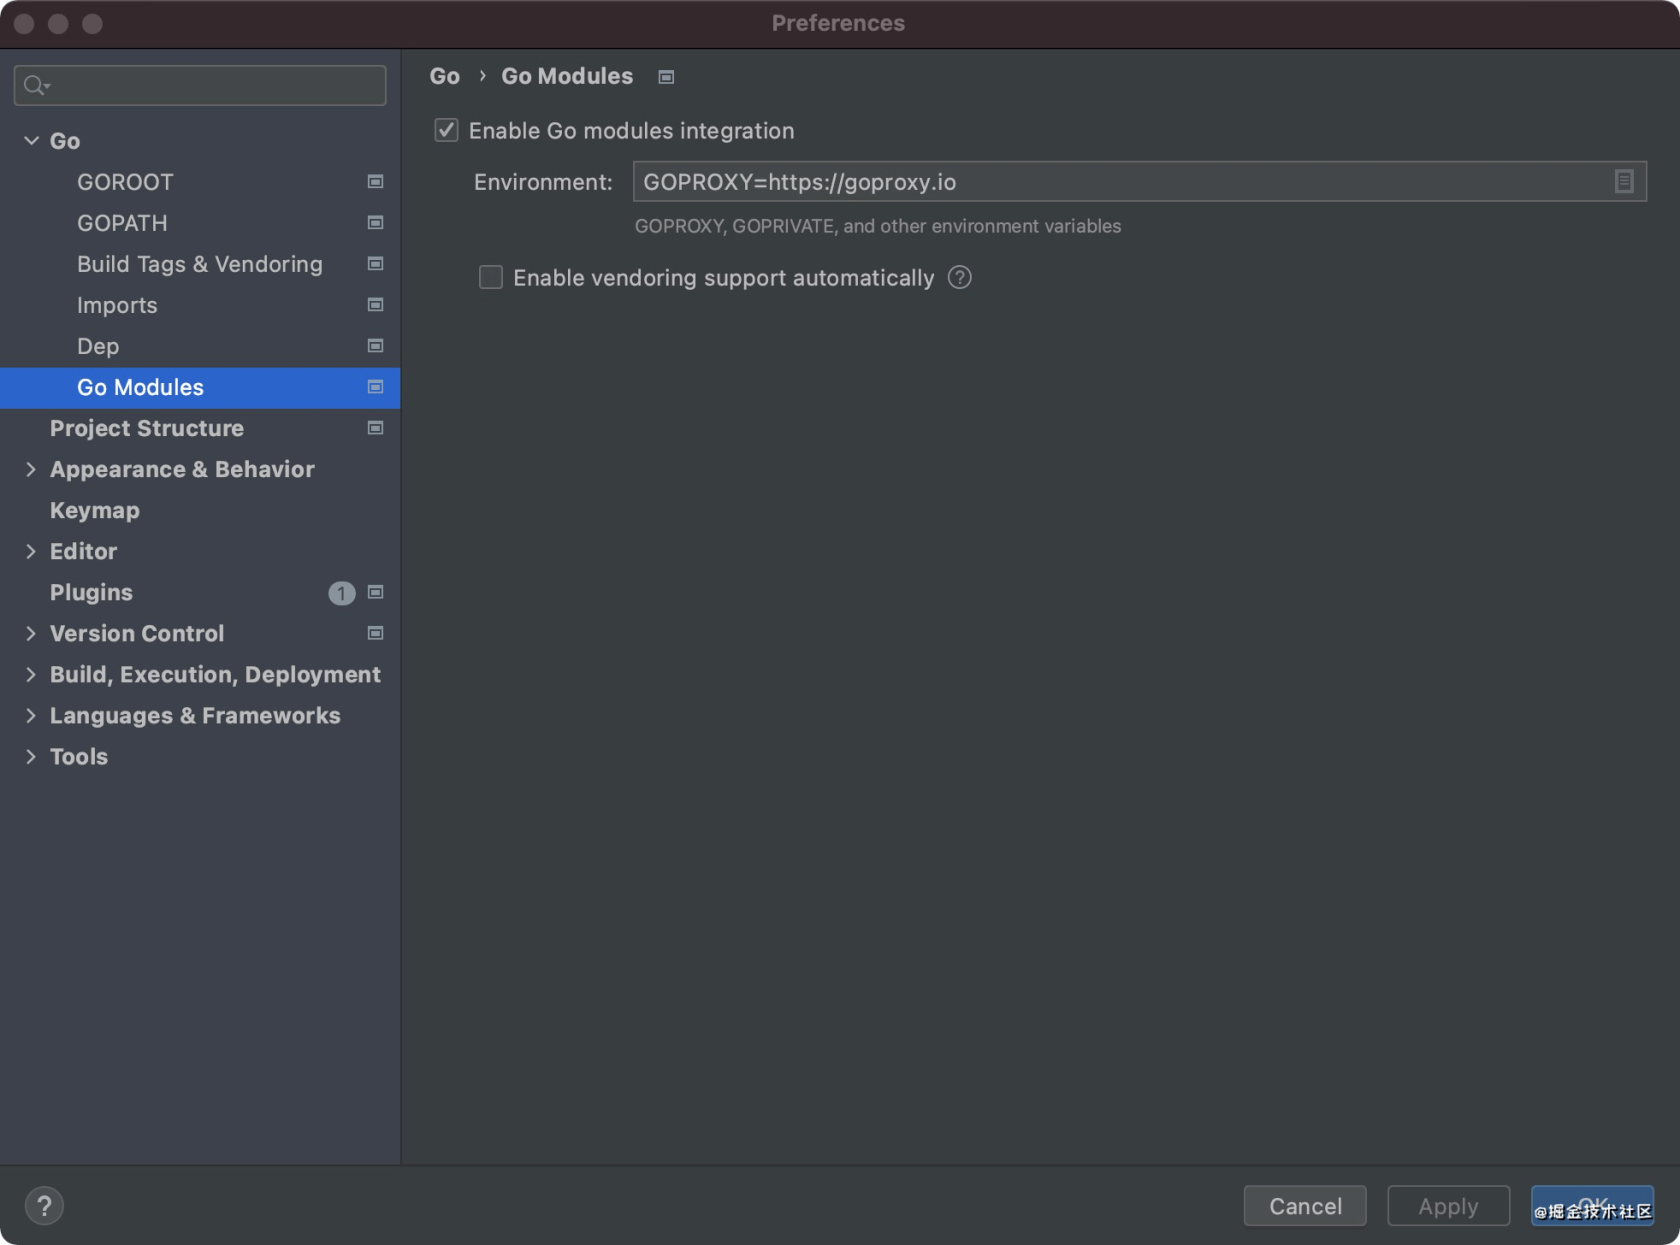
## 1.4 开启代理 (因为国内下载包较慢或者失败,配置代理能更好的帮助我们获取第三方包)
**Mac**
```sh
vim ~/.bash_profile #打开 bash_profile
# 将以下代码复制到 bash_profile 中
export GO111MODUL=on # 开启 go module
export GOPROXY=https://goproxy.io # 设置国内代理
#保存
:wq
#刷新
source ~/.bash_profile
```
**Windows**
```sh
set GO111MODUL=on # 开启 go module
set GOPROXY=https://goproxy.io # 设置国内代理,推荐使用该地址
```
## 1.5 查看是否配置成功
```sh
# 输入命令
go env
```
## 1.6 打开Goland (先不要创建项目)
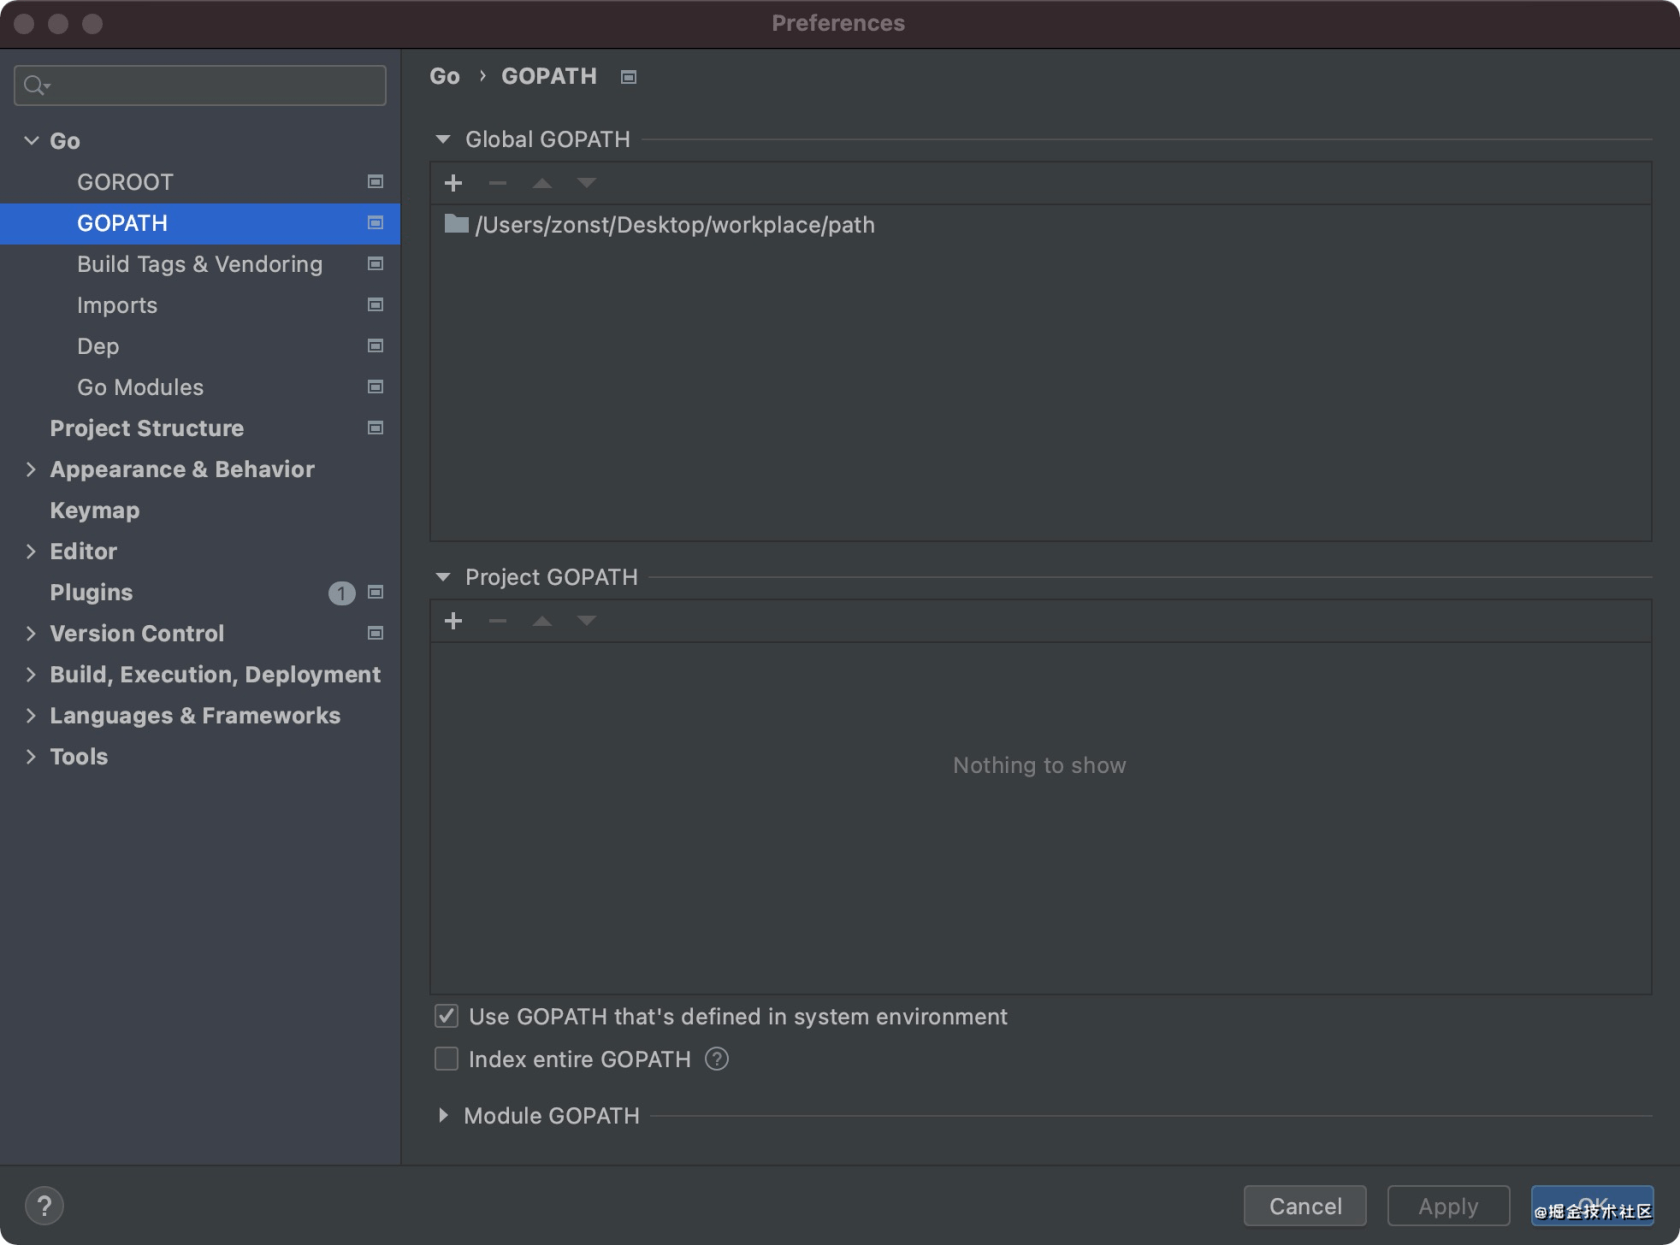
- 配置设置 `Setting -> Plugins... -> Go -> GOPATH`

- 取消勾选 `index entire GOPATH` (勾选后会将当前项目作为GOPATH)
- golang会自动在 `$GOPATH` 的`src`目录下查找项目代码
- 查看Goland中是否也配置了代理

# 2.创建项目
## 2.1 只需要在 `$GOPATH/src`目录下创建可以
- 如果出现错误,可以在项目的`Terminal`中从 1.4 开始配置
## 2.2 在项目中初始化 module
```sh
go mod init project_name
```
## 2.3重启项目来刷新 `go build` 显示为可用
有疑问加站长微信联系(非本文作者))


